
bimmerpost/
G87 / G42
BMW M2 and 2-Series Coupe

| 07-05-2024, 11:48 AM | #1 |
|
Captain
 
1159
Rep 791
Posts |
Audio upgrade - no plug-n-play amps/speakers
Howdy!
71dsp (wanted to tag you since you said you were interested in what all I had done. Hit me up if you have any questions!!) I wanted post about my DIY audio upgrade that did not utilize the "go-to" brands direct replacement or plug-n-play options. Figured others might be interested in doing the same and you're curious about the level of skill & work involved. Very few pics here as there is really nothing to show. First, here's everything I did:
You will need various sized sockets, Drremel with cutting bit, trim removal tools, retractable wire fish tool, torx bits, soldering iron/solder. And shrink tubing & heat gun to make clean wiring connections. Degree of work involved for installation of speakers: The doors are challenging with the CDT speakers. This is because the CDT speakers use full sized ferrite magnets. This requires cutting of the hard-plastic panel that covers the door opening, under the interior trim panel. Remove the interior door trim panel AND remove the hard plastic cover attached to the door under the interior trim panel. No way I was going to make a video of this as I am no expert in making clean cuts, but fit the CDT speaker after removing the HK 4" speaker & you will see where you need to cut away the hard plastic panel to make room for the huge CDT magnet. Be sure you do not cut away the speaker mounts! Attach the speaker mounting ring & then mount the CDT 4" speaker. Use double-sided tape to mount the CDT crossover to the plastic cover & then attach with screws. Cut small strips of the Sonic Barrier to fill in any gaps between the 4" speaker & the plastic door cover. See pic for where to mount the crossover. The CDT Audio tweeter is silk - and it sounds amazing. BLOWS THE DOORS off the HK tweeter. You won't believe the highs you are missing with the HK system. After you remove the HK tweeter from the housing, the CDT tweeter snaps right into the same spot. Push in with CARE! I then used a small amount of hot glue to hold it in place to make certain it doesn't pop out. While you have the door apart, install the Kilmat & Sonic Barrier. You have PLENTY of room to cover 90-95% of the door. Let me tell you - your door will be tight as a drum. It sounds like you're knocking on a solid wood door when you knock on my door's exterior. The resulting reduction in the volume of exterior sound that comes through the door is dramatic! Run all of your wires to the speakers & crossover (BMW specific speaker harness kits help tremendously!!), tie them off & you're ready to put your door back together. Swapping in the Morel under-seat subs is a very easy, straightforward process. You don't need a video to do it - it is self explanatory - but they're on YouTube if you need them. The rear deck speakers are also a little challenging. You will need to cut the plastic mounting area to fit the CDT magnets. The mounting area is also very shallow. (Do not use a speaker mounting ring here.) The best solution so that these speaker fit - slowly & carefully sand/smooth the phase plug tip, removing a little bit at a time until the plug does not hit the speaker grille. You will need to cut a hole for the tweeter & mount the tweeter to the speaker grille. Do this carefully & your finished result will look fantastic! I stuffed the crossover into the space under the deck interior trim & used double sided tape to hold it in place so it doesn't rattle. Installing and mounting the amp: I am not going to get into the Technic harness or connections. That is all self-explanatory. I am just going to talk about "the missing" installation tips that make this easier for you. I am also not going to get into how to set up the AudioControl amp. There are plenty of very informative YouTube videos that provide tons of details. This amp is HIGHLY configurable & the software is very easy to use. And it is VERY powerful, esp to the subs. 125 watts into 4 ohms (CDT Audio speakers are 4 ohms) and 200 watts into 2 ohms (the Morel subs are 2 ohms.) The sound quality is second to none! You do not realize how loud this thing is because it is simply clean, clear & insanely powerful. My amp is mounted in the trunk, visible, by the driver's side wheel. If you want to install yours in the same place, some extra steps are needed. After installing & powering up, I noticed the amp glows blue - pretty cool! You can see it in the pics. You will need to add at least 4' pigtails to the speaker input/output wires on the Technic harness - AND LABEL THEM! This is important so you know what goes where when connecting everything to the amp. You will need to drill large holes in the driver side wheel well interior trim to pass wires through from the harness to the amp. Use grommets to finish the holes & it looks great. I mounted the amp to the interior trim panel using bolts & washers, and also using pieces of perforated flat bar, as you will see in the pics. I covered it in pieces of the OEM floor mats that I no longer needed since I got a set of Cocomats. I just have to sew the cut edges together to finish it off so it looks nicer. Make sure you get the ACR3 remote controller. You will run that wire through your trunk, under the rear seat, under the carpet in the rear passenger area. You will need to remove the rear seat (install Kilmat here while seat is out, too!) Also, remove the trim on the back of the center console (the piece with the vents). You will drill a hole through the back & into the console interior to send the ACR3 control wire through. Mount the ACR3 remote in the center console. You will use this to control subwoofer level & switch between tunes, if you've done more than 1. You can control the entire system level with the ACR3, but I use it only to control the sub. You can get all of this done in a day as long as you have everything you need. To tune the sound, you will need a pink noise file, preferably NOT MP3 but full resolution quality. You can use a mic - but you don't need one. The D-6.1200 has a built-in RTA & can process/show the frequency curve of the pink noise output in the software. This is sufficient to get you seriously high fidelity results. You wanna go crazy - get a mic & go crazy.  I left one of the amp's tuning banks empty - this results in the factory tune applying to the sound. My #1 bank is completely flat freq response, all channels summed, using the amp's crossover set at 80 hz. All distances set in the amp's DSP as well. Keeping the volume the same & switching between banks 1 & 3, the sound quality difference is nothing short of astounding!! You need an amp that can take high-level speaker inputs (that may or may not already have a factory tune applied) and have them all summed & then flattened so YOU can apply your own tune. This was a lot of work - way more than what I had to do on my F87. But now that it is done, I am 100% glad I did it. Anyone local/close to CT, if you want to hear the system, hit me up & I'm happy to meet & let you hear my system. I cannot be responsible for any urge you have to spend more money. 
__________________
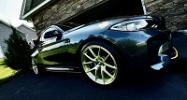
2024 M2 | BSM | 6SPD | Port-Installed M Perf HAS | MAD Axle-back Exhaust | MAD CAI with blue filters | Dinan Midpipe | Richland Forged RF-GT3R Wheels Brushed Competition Gold & machined face | AudioControl D-6.1200 Amp & DSP | CDT Audio ES Gold Fronts & Rear | Morel BMW-Specific Subwoofers | Lots of neat interior upgrades!
 Last edited by MASHCT; 07-05-2024 at 12:00 PM.. |
Post Reply |
| Bookmarks |
|
|


